What is the Engduino?
The Engduino is just a simple, small, computer that is capable of measuring quite a lot of interesting things about the real world and that has a bunch of LEDs (lights) that can be used to provide feedback to the user.
This is a first hands-on tutorial, intended for people who have never used similar computers before or, for that matter, done any programming. It is a step-by-step guide to creating a very simple program and watching that run. As we hope you’ll find, this is quite an exciting thing to do. And the good news is that it doesn’t stop there – as you improve in programming ability, you can also build really quite sophisticated things with the Engduino.
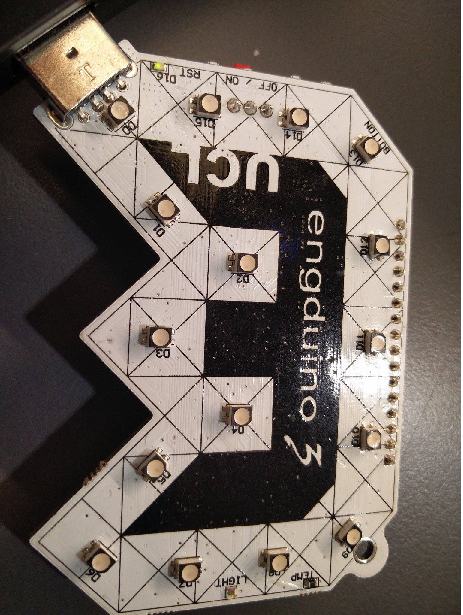
Overview of the Engduino Board
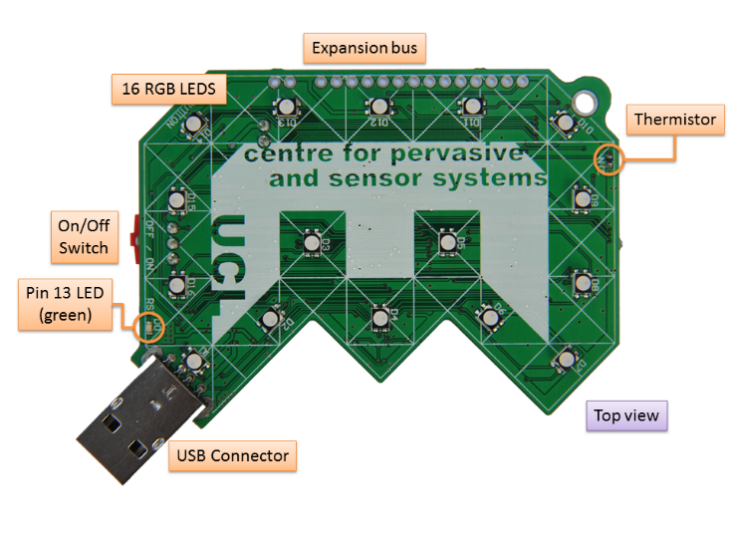
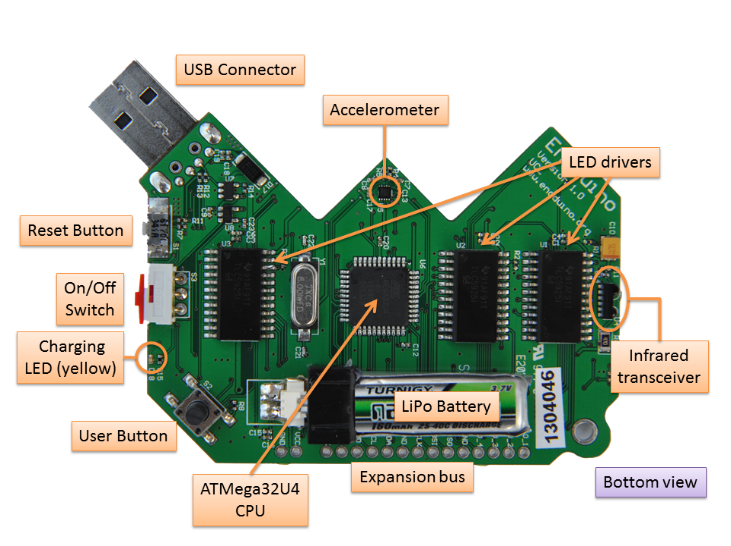
Main features:
- 16 bright RGB LED lights
- A user input button
- Sensors
- An accelerometer
- A temperature sensor
- Light sensor (v2 and v3 only)
- Magnetometer (v2 and v3 only)
- An infrared transceiver
- A rechargeable battery
- Micro-SD card reader (v3 only)
- USB programming and communication interface
Connecting and Setting Up the Engduino
The Engduino can establish a connection with a computer over the USB, simply by using the serial port for reading and writing of data. To get your Engduino set up and running, please look into the following steps:-
Step 1
Download the Arduino-Engduino environment, unzip the files and install the software from this link:- http://www.engduino.org/html/Download.html
Step 2
Connect the Engduino board to your PC through USB and turn on the Engduino. You can also use a USB extension cable if movement flexibility of the Engduino is required.
Your computer will begin the driver installation process. If it fails, open up your 'Device Manager' for Windows and look for 'Unknown Device' under 'Other Devices'.
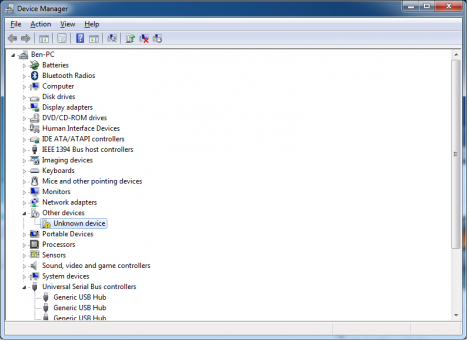
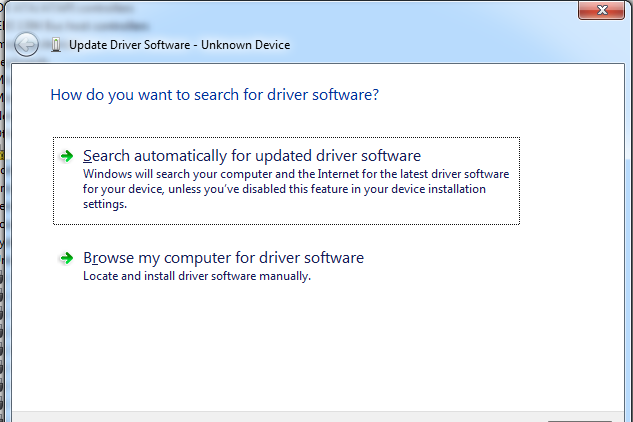
Right click on the 'Unknown Device' port and choose the 'Update Driver Software' option. Next, choose the 'Browse my computer for driver software' option. Then, navigate to the 'Drivers' folder of the downloaded Arduino-Engduino folder, and select the driver file to install.
Once done, you should be able to see which port number your Engduino is connected to. In the case where a Engduino v3 is used, you should see 'Arduino LilyPad USB' connected with a corresponding port number. (COM17 in this case).

Step 3
Open up the Arduino-Engduino software that you have installed, and you should get a window like this.
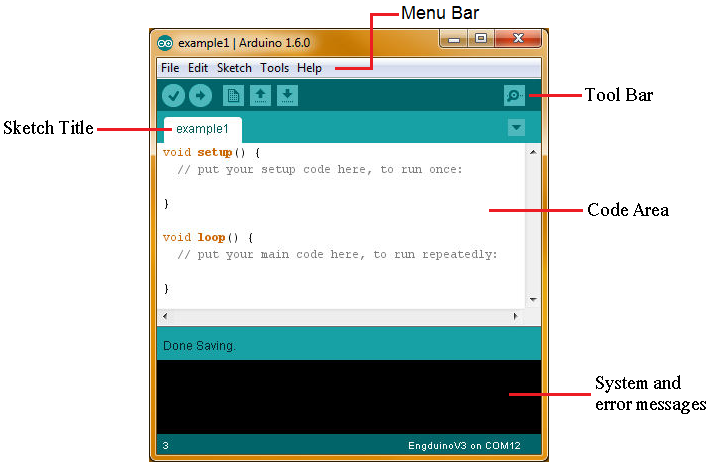
Navigate to Tools --> Board and select the right Engduino board that is connected. Then, use the Tools --> Port to choose the correct communication port (serial port) for your computer to talk to the Engduino.
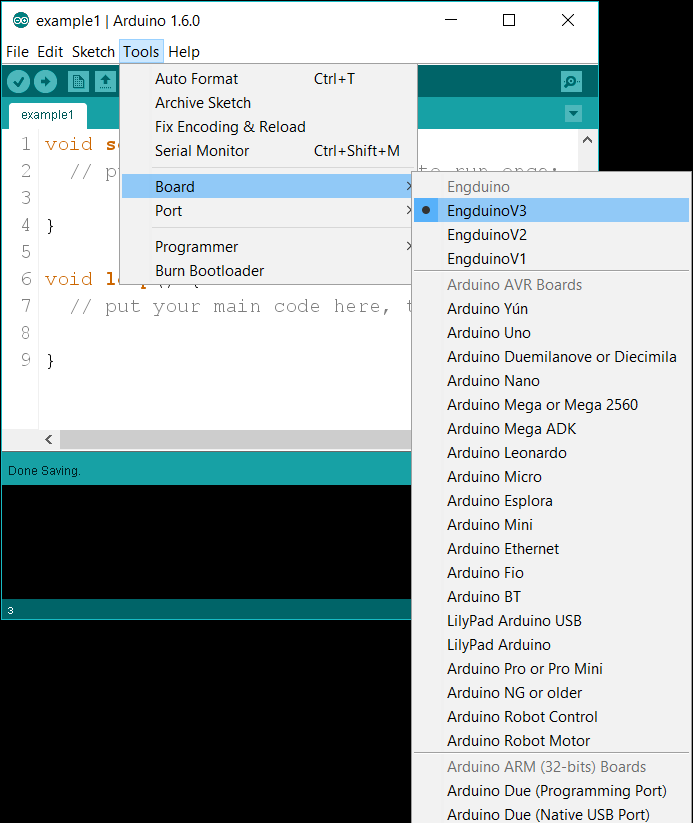
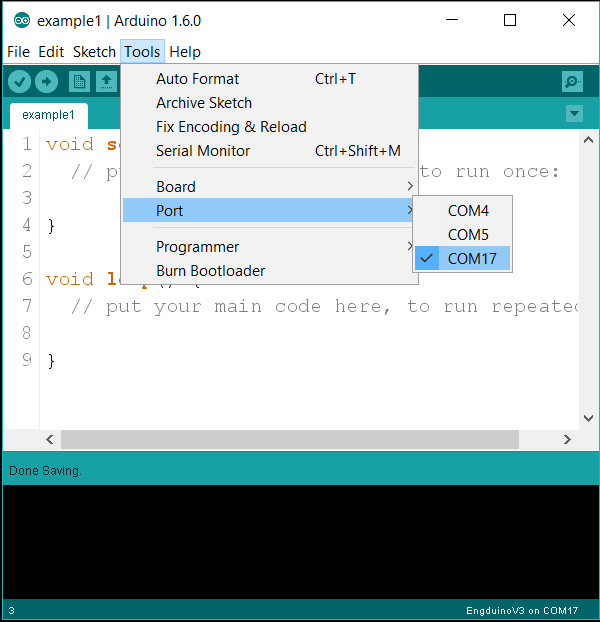
*Note that you have to select the correct port number that corresponds to the port number on the 'Device Manager'.*
Step 4
Go to File --> Examples --> 01.Basics --> Blink and click on the 'Upload' button (the right arrow button).
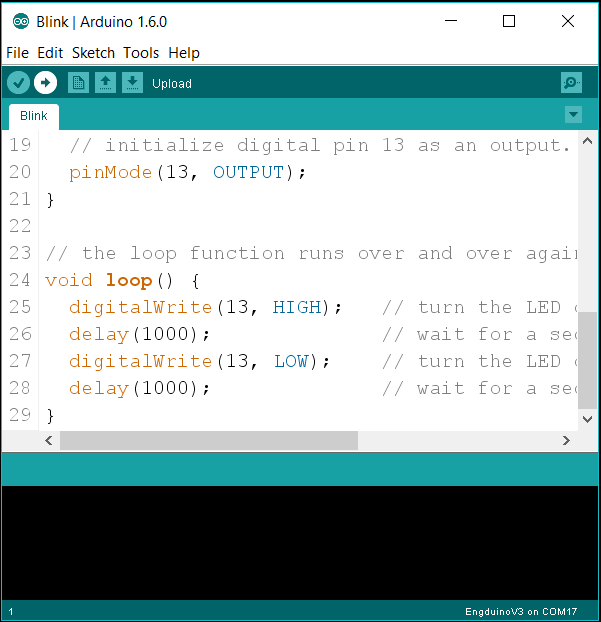
If the previous steps are all done correctly, the code should be successfully uploaded and you can now see a green LED light blinking on the Engduino board.
You are now good to go!