Getting Started with the library
Seems like you've read through the introductions and you're eager to start on your first project. That's great! However, you'll have to follow the steps below to set up the Engduino and to enable communication between the Engduino and Greenfoot. Without further ado, let's jump right in!
*REMINDER*
You are required to install the Arduino-Engduino environment through this link:- http://www.engduino.org/html/Download.html
Once installed, open the application and paste the following code into a blank sketch (note: you will have to delete the initial text displayed on startup).
#include <EngduinoLEDs.h>
#include <EngduinoButton.h>
#include <EngduinoThermistor.h>
#include <EngduinoLight.h>
#include <EngduinoAccelerometer.h>
#include <EngduinoMagnetometer.h>
#include <Wire.h>
#include <stdlib.h>
int state=0;
String h;
long lastCall;

void setup() {
  EngduinoLEDs.begin();
  EngduinoButton.begin();
  EngduinoThermistor.begin();
  EngduinoLight.begin();
  EngduinoAccelerometer.begin();
  EngduinoMagnetometer.begin();
  lastCall = millis();
}

void getInput()
{
  while (Serial.available() > 0)
  {
    int from = 0, to = 0, i = 0;
    int *values = (int*)malloc(sizeof(int)*6);
    h = Serial.readStringUntil('\n');
    Serial.println(h);

    while(i<6)
    {
      from = to;
      while(h.charAt(to) != ',' && to < h.length())
      {
        to++;
      }
      *(values+i) = (h.substring(from,to)).toInt(); // take the part of string which is between comas and convert it into int
      i += 1;
      to++;//skip the comma
    }
    execute(values);
    free(values); //clean memory
  }
  if (millis() - lastCall > 200)
  {
    lastCall = millis();
    printFunction();
  }
}
//for more commands
void execute(int *values)
{
  switch(*values)
  {
    case 1:
      lights(values);
      break;
    default:
      break;
  }
}

void lights(int *values)
{
  if(*(values+2) == 0)
  {
    EngduinoLEDs.setLED(*(values+1),OFF);
    return;  //break
  }
  EngduinoLEDs.setLED(*(values+1),*(values+3),*(values+4),*(values+5));
}

void printFunction()
{
  float accelerations[3];
  EngduinoAccelerometer.xyz(accelerations);
  float x = accelerations[0];
  float y = accelerations[1];
  float z = accelerations[2];
  Serial.print("1: ");
  float a = sqrt(x*x + y*y + z*z);
  Serial.println(a);

  if(EngduinoButton.wasPressed()) state=!state;
  Serial.print("2: ");
  Serial.println(state);

  Serial.print("3: ");
  float f;
  f = EngduinoThermistor.temperature(CELSIUS);
  Serial.println(f);
  float magneticField[3];
  EngduinoMagnetometer.xyz(magneticField);
  float d = magneticField[0];
  float b = magneticField[1];
  float c = magneticField[2];
  Serial.print("4: ");
  Serial.print(d);
  Serial.print(" ");
  Serial.print(b);
  Serial.print(" ");
  Serial.println(c);
  Serial.print("5: ");
  Serial.println((int) 100 * (EngduinoLight.lightLevel() / 1023.0));
}

void loop() {
  // put your main code here, to run repeatedly:
   getInput();

}
Upload the sketch containing the code above with the Engduino plugged in through USB. Once successful, you can move on to the next steps.
**
For the purpose of this course, you will also need to install Greenfoot Version 3.1.0 or above. You can find the download links for your machine here:- http://www.greenfoot.org/download
Next up, download the "Engfoot.jar" file from the latest release through this link:- https://github.com/JCobbles/Engfoot/releases/
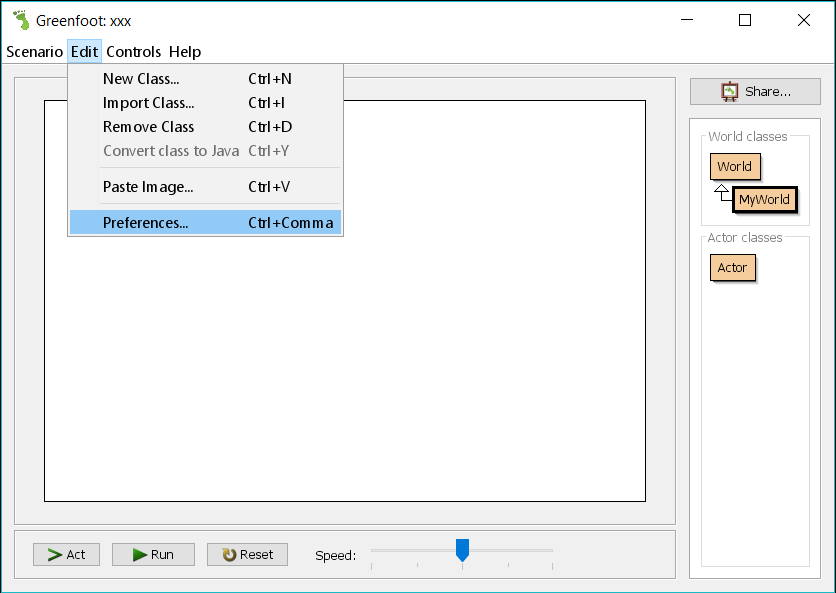
Once done with the downloads and installations, run Greenfoot. The file is a library that has to be added into Greenfoot. To do this, select 'Edit' from the menu bar, then select 'Preferences'.
A window should pop up like this. Navigate to the 'Libraries' tab and click on 'Add'. Browse your computer for the .jar library file and add it. Having done so, it should look something like this.
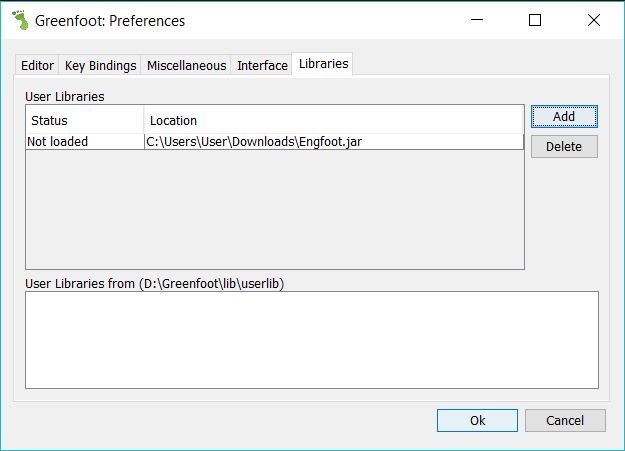
After that, you will be required to restart Greenfoot to load the library.